Swoogo Installation
This article describes the general process for installing your InGo widgets on a Swoogo event, and assumes that you are familiar with creating events within InGo. If you have not yet created an event in InGo, please see our article on creating a new event campaign.
As Swoogo has a built-in InGo integration, the process of getting things up and running is pretty quick and easy!
Requirements
- An existing event within Swoogo
- Two unique pages to install InGo on:
- A home page or landing page
-
- A "Thank You" or confirmation page
Get Started By Gathering Your InGo Widget IDs
Through your InGo event, we will need to first grab each widget ID so they can be plugged in through Swoogo's interface. After selecting which Group's widgets to install, navigate to the Install Widgets page and select Swoogo from the dropdown list. A set of four widget IDs should appear on the page, such as shown below.
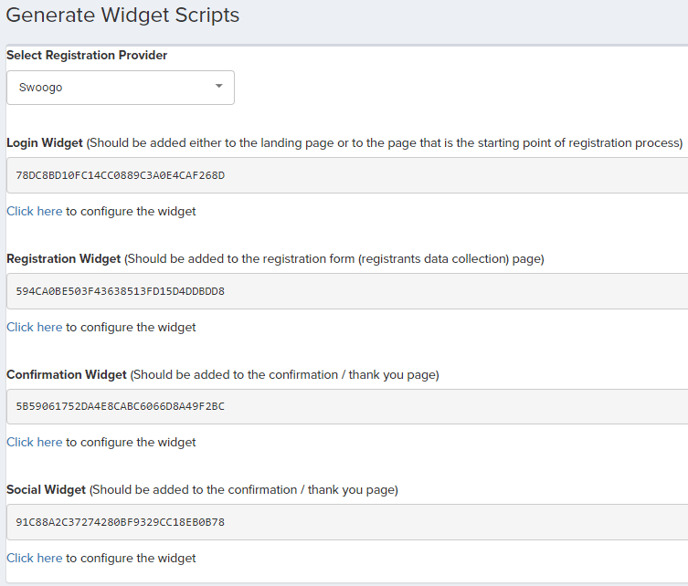
Keep this page open as we'll need these IDs shortly. In a new tab, open up your Swoogo event to finish the setup there.
Set Up Your Integration
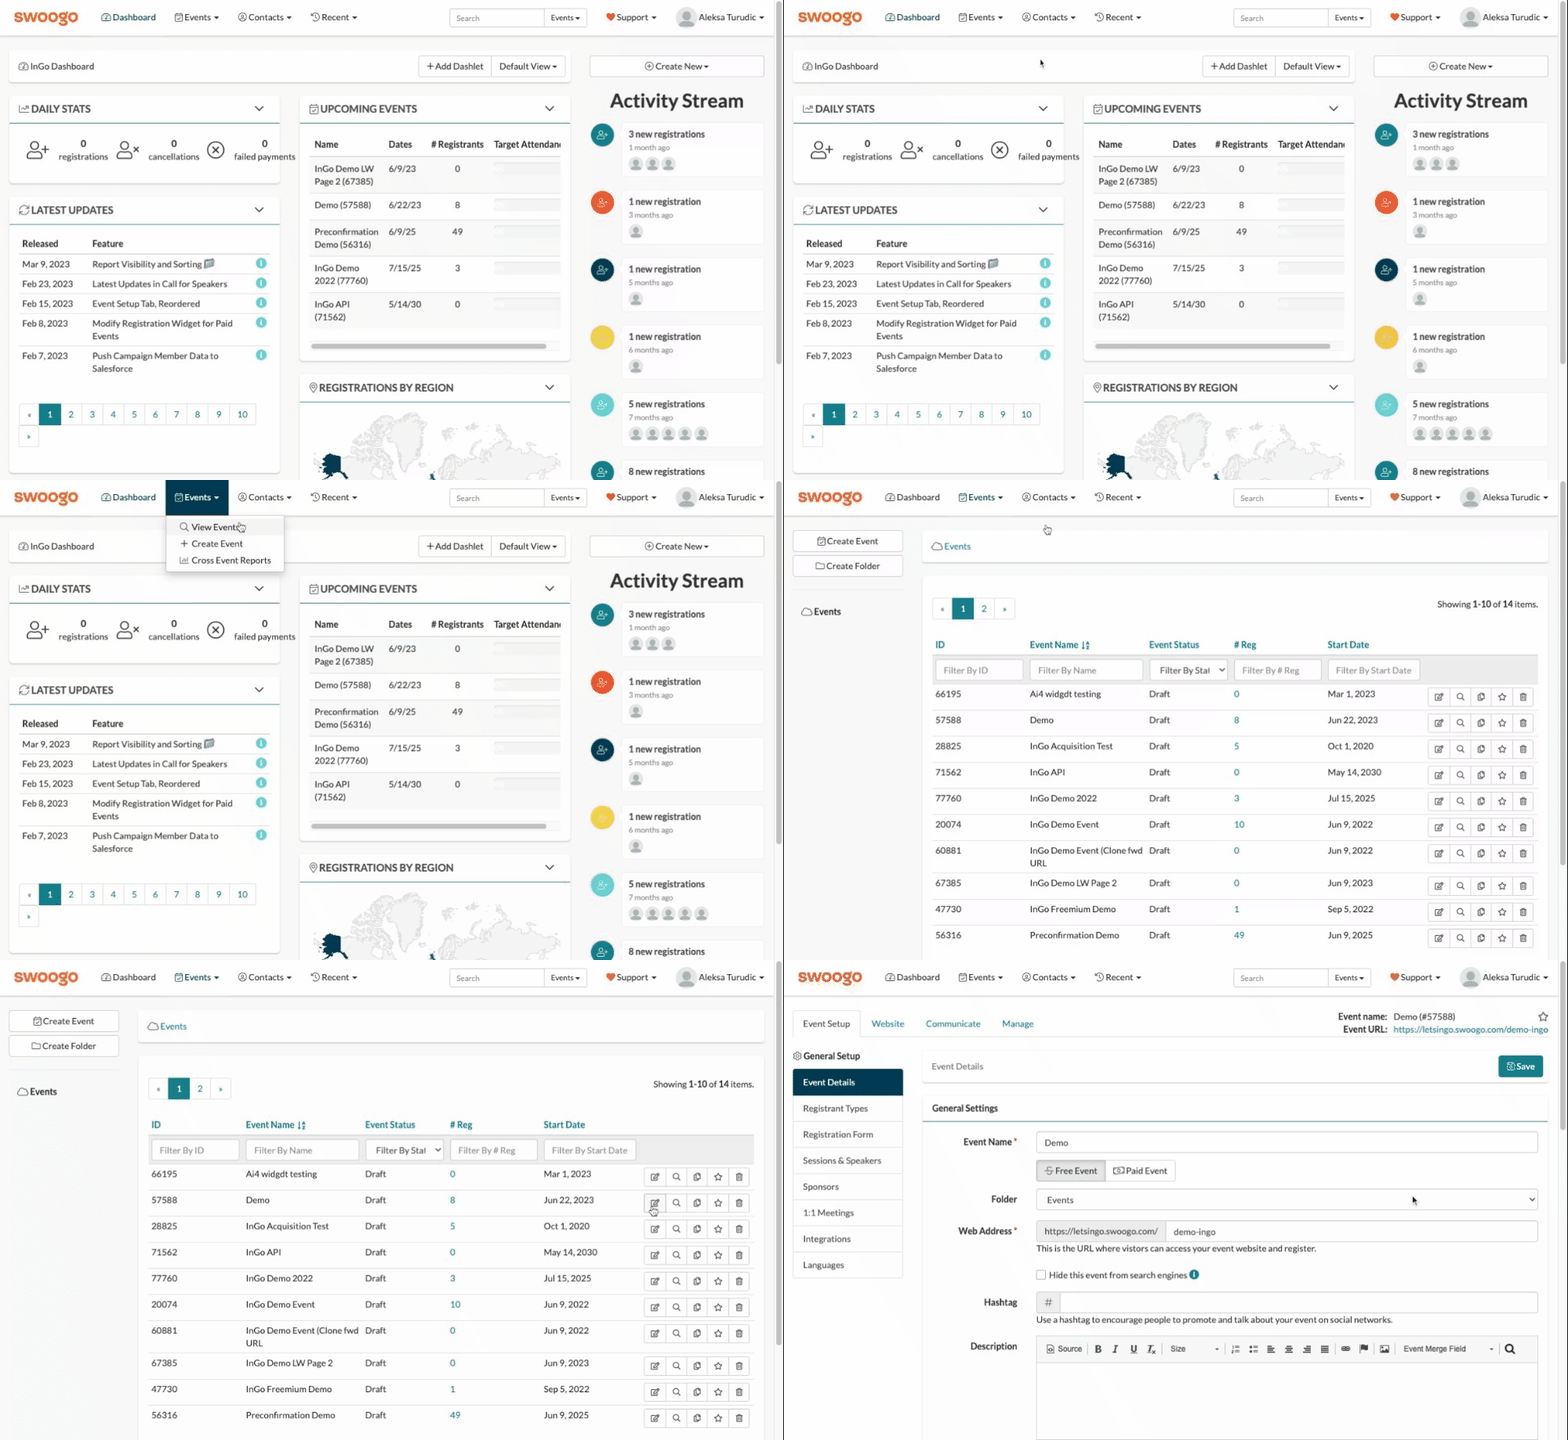
We'll need to first open your Swoogo event page to start adding your InGo IDs to the event. To reach this page, look to your top navigation and select Events, and then View Events. On the next page, find your event in the list displayed and click on the update button (pencil and paper icon).
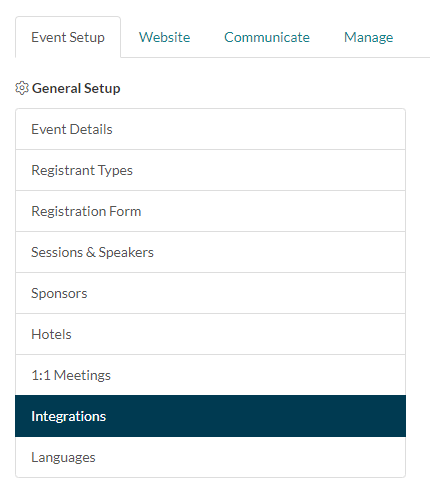
Next, while under the Event Setup tab, we'll select the Integrations option from the left-hand navigation menu.
From the list of integrations, select InGo and then follow the steps below:
- Click on the "Enable InGo integration for this event" checkbox to activate InGo functionality.
- Change the InGo Version to Full.
- Add your four InGo Widget IDs into their respective fields. Please keep in mind that each widget ID is unique and serves a specific function so they may not be duplicated.
You may see an option listed Enable InGo Advocacy, however please ignore this. This is deprecated functionality and may break your InGo install if used.
Once complete, click Save to complete the integration setup.
Adding Your InGo Widgets Into Your Event Flow
We're almost done now! On Swoogo the Registration and Confirmation Widgets are installed automatically into your site as these do not have a visual UI, however we will need to manually place the Login and Social widgets within their respective pages. Click on the Website tab at the top of your screen to begin this step.
Add the Login Widget
Reminder: this widget should be installed before the registration step or any type of data-collection/form pages. We recommend this to be placed on a landing or home page.
Select Pages from the left-hand icons and, under the Website tab within this menu, click on the Home option. If you do not have a Home option or have renamed your pages, please select a page prior to registration where this widget can be placed.
Next, once you've found where you would like this widget placed on the page, click on the Add Content button and scroll down to the Social, Promotion & Engagement section. Drag and drop the InGo Login option to where the widget will live on your page, which should instantly display on the screen.
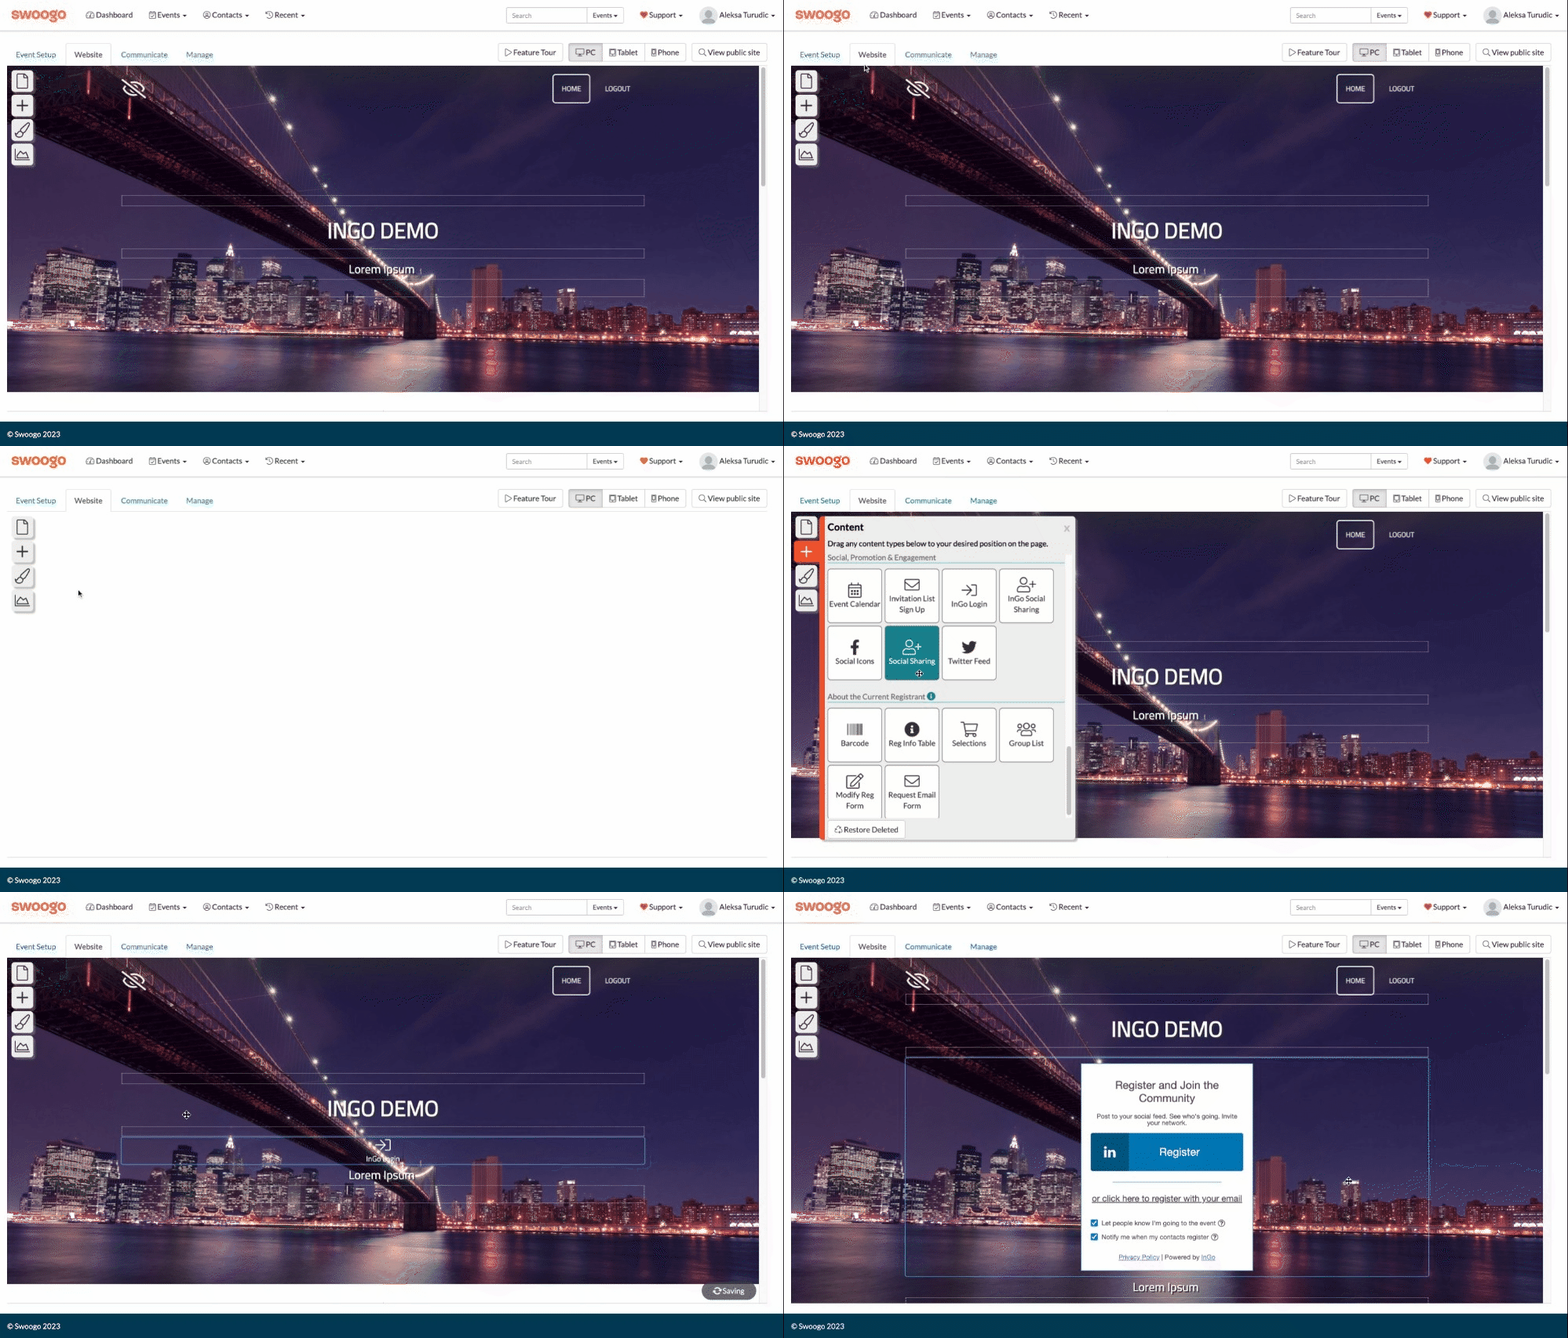
Now that your Login Widget has been installed, please review your pages thus far for any options that may let your registrants reach a registration/form page without going through your InGo widget such as buttons, links, etc. Once major one we'll want to address is your page navigation, which we'll tackle in the next section.
Hide the Register Page
To ensure that all users for your event are going through the InGo Login widget to reach your registration page, we'll need to hide the default navigation option to reach this step.
Leaving the Register navigation option available will allow users to bypass InGo entirely, which will impact the effectiveness of your campaign.
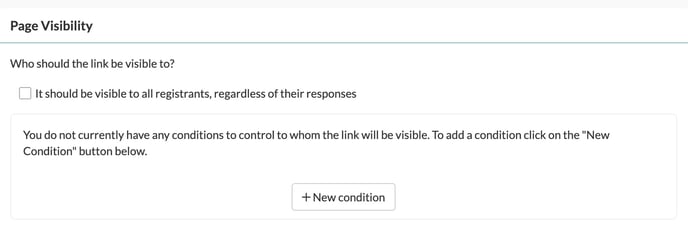
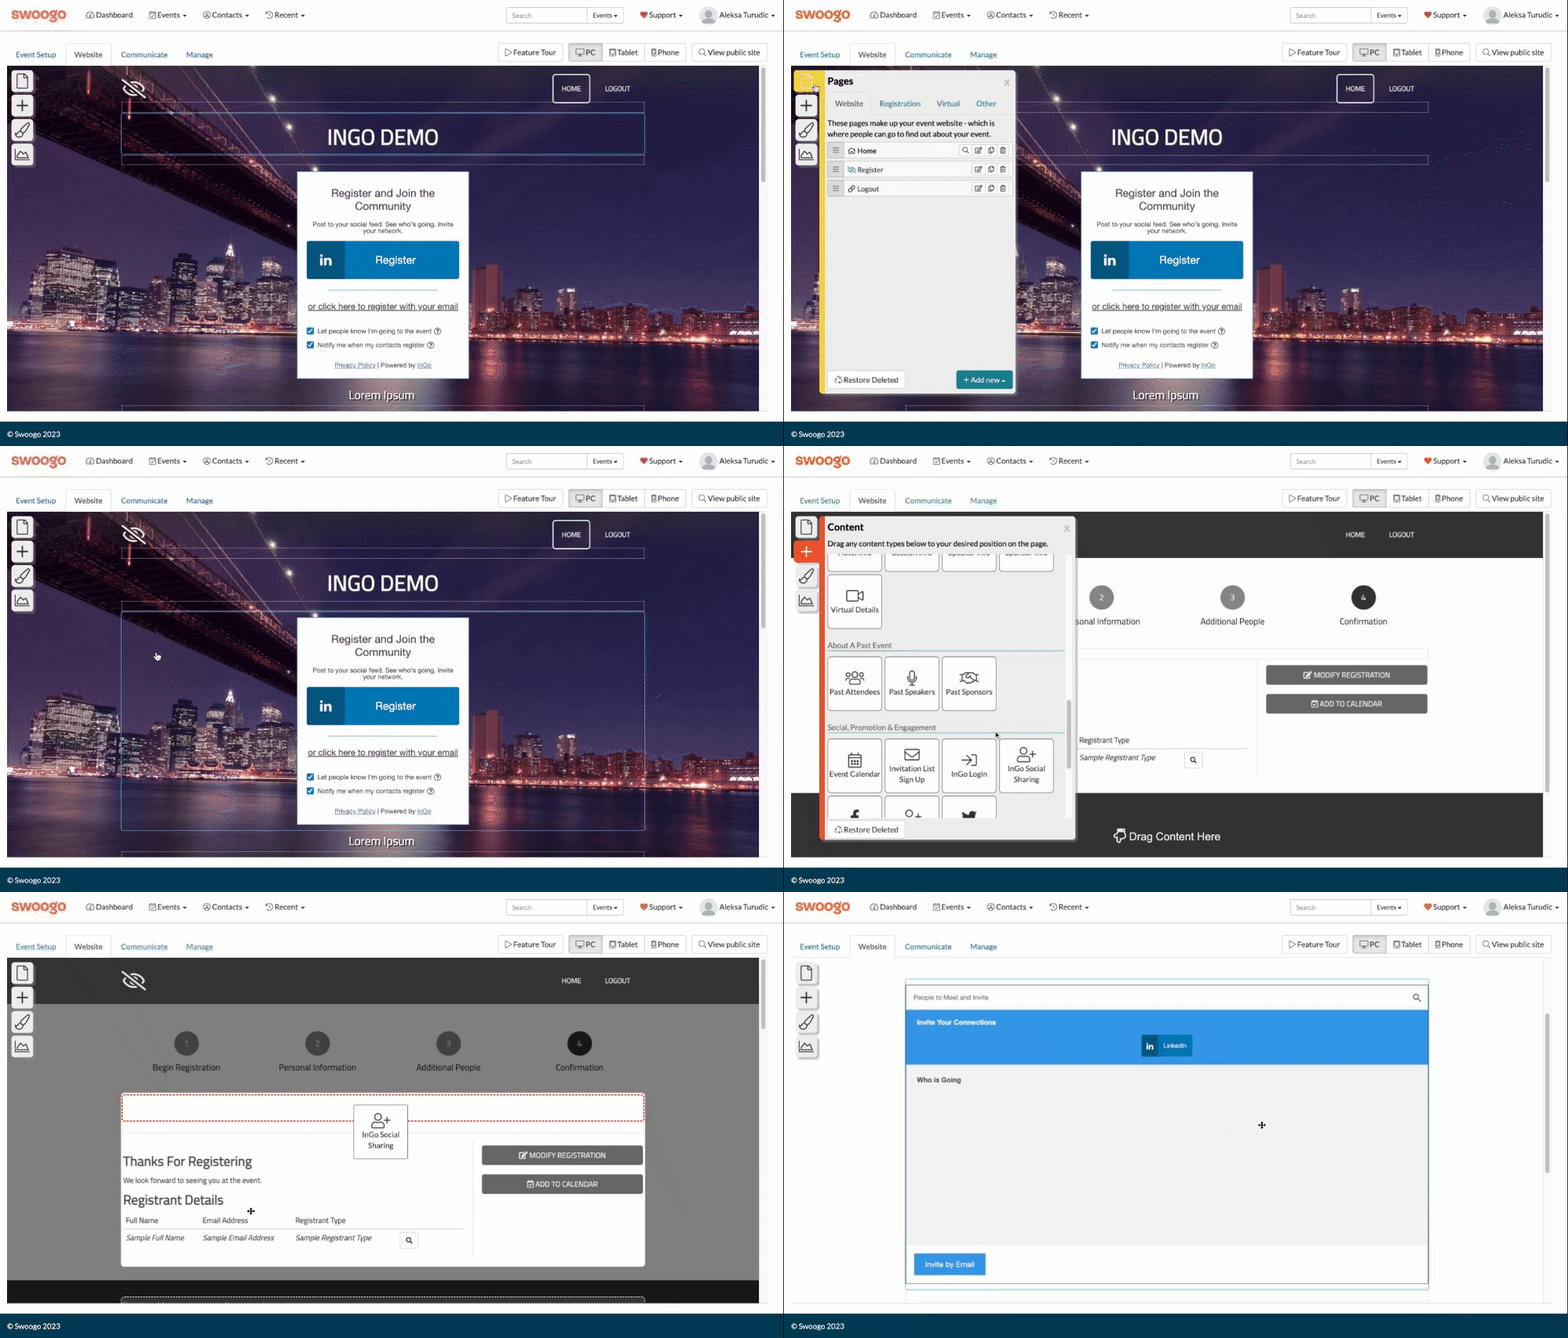
From the left-hand menu, select Pages once more and click on the Register option to open up the configuration settings in a pop-up. Under Page Visibility, uncheck the box for Who should the link be visible to? to hide this option from users.
Add the Social Widget
Reminder: this widget should be installed in a prominent place on your confirmation/thank-you page to see the best results. We recommend as close to the top of the page as possible to ensure it is visible to your registrants.
Select Pages from the left-hand icons and, under the Registration tab within this menu, click on the Confirmation option. This will almost always be the last option listed.
Next, once you've found where you would like this widget placed on the page, click on the Add Content button and scroll down to the Social, Promotion & Engagement section. Drag and drop the InGo Social Sharing option to where the widget will live on your page, which should instantly display on the screen.
Test Your InGo Installation
Now that InGo has been installed into your event, we'll want to test things out to verify everything has been set up and is ready for your registrants to use. Click here to review our article on troubleshooting an InGo event and testing a fresh install.
And that's it! For any questions or assistance with setting up a Swoogo installation, please reach out to support@ingo.me.

