This article describes the general process of installing InGo using your existing Google Tag Manager (GTM) account. If you do not yet have a Google Tag Manager account, please see Google's support article on the topic, which steps through the entire process.
While InGo is generally quick and easy to install, some websites or platforms do not allow for custom HTML to be added to pages. GTM offers a robust solution to this limitation as our widgets can then be placed on your pages dynamically as needed.
Requirements
- The event platform being used must allow for custom HTML to be added to the HEAD tag of your page(s) or have an existing integration with Google Tag Manager.
- A Google Tag Manager account with a container for your event. This container should have a Target Platform of Web.
Getting Started
If you have already created your Tag Manager account and container, and have installed your container, please skip to the section titled Adding InGo to Your Container.
If just beginning with Google Tag Manager, please see the following step-by-step video from Google on how to create these directly. This process should take less than 5 minutes total, on average.
Installing Your Web Container
Once your event's container is created and you have access to your script tags, these will need to be installed into your website or event platform to enable Tag Manager's functionality. The two main methods to accomplish this would be through the HTML code directly or through an existing integration with GTM.
Adding Tags via HTML
If adding your container's scripts to a custom website or a platform that allows custom HTML to be added, each script will need to be added into their respective section. Tag Manager will let you know where each piece of code needs to live, such as in the HEAD tag of your page or directly after your opening BODY tag.
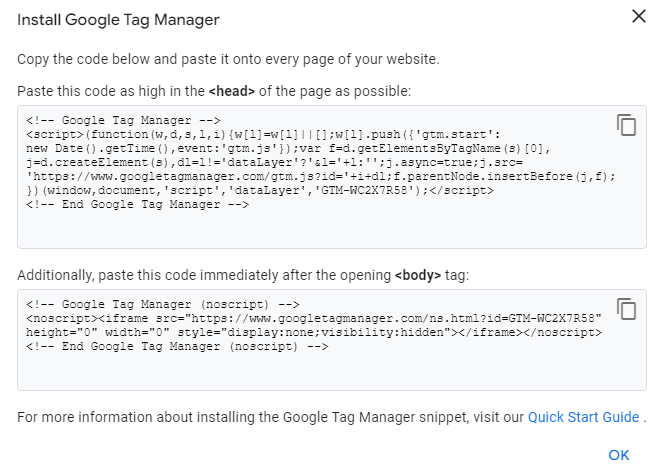
We typically recommend working with a developer within your organization to install these code snippets for the best results.
Adding Tags via your Platform's Integration
If the platform you are using has an existing Integration with Google Tag Manager, your experience may vary on how to place your scripts on your site. Some platforms may offer you the ability to connect your GTM container with just the container ID, or it may have a dedicated section for you to add your code.
For example, the site LeadPages has an integration with Google Tag Manager and has a dedicated section under their Analytics page settings to add this code.
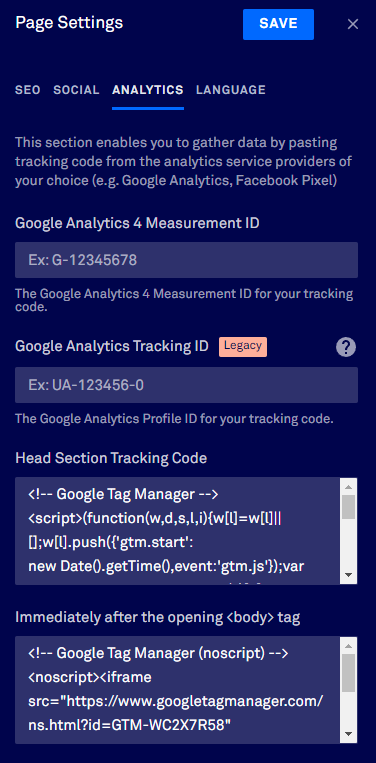
We recommend referring to your specific platform's documentation or reaching out to their support team for more information on using their Google Tag Manager integration.
Adding InGo to Your Container
At this stage, we are now ready to start setting up your tags to work with your InGo widgets. You'll want to first locate your event's widget scripts to add this to Google Tag Manager, which can be done by following these steps. For this type of installation, the Generic Manual scripts will be used. Keep these handy for later!
Creating a New Tag
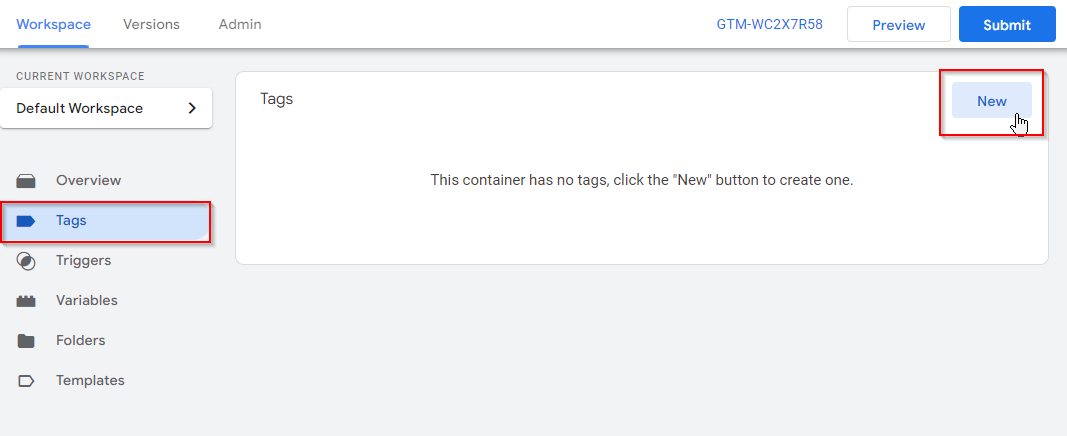
Moving back to Tag Manager, while in your container's Workspace page click on the Tags button in the left navigation menu. On this page, we'll want to click the New button in the top-right.
A menu will slide out from the right-hand side of the page with some basic configuration options for your new Tag. For ease of reference, we recommend naming each new tag after the widget it will be used for.
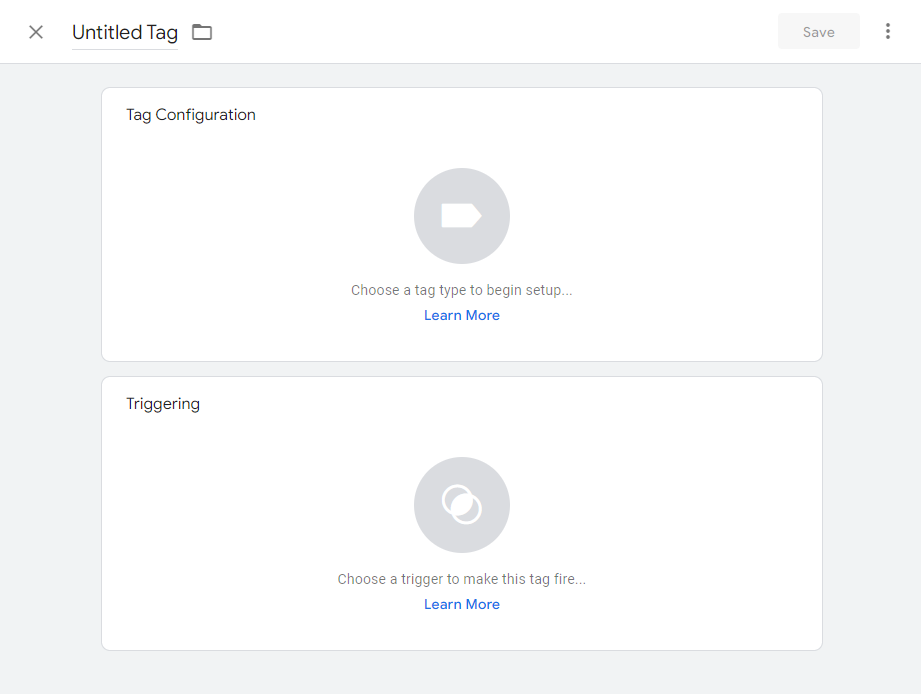
Configuring a New Tag
Next we'll need to choose a Tag Configuration type. Clicking on the Tag Configuration box will bring up another menu from the right-hand side of the screen. Scroll down or search for Custom HTML and select this type.
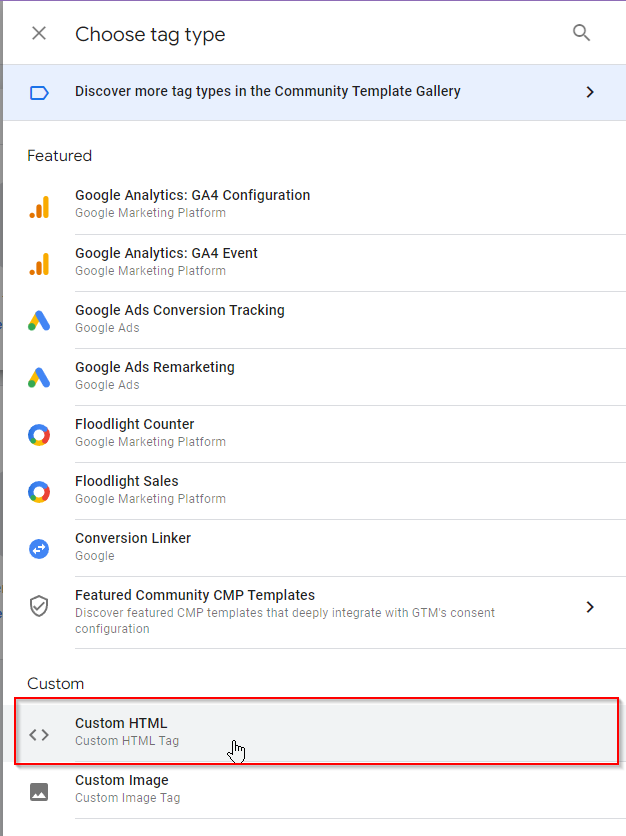
Now that we have the tag type selected, we can add our InGo widget script. In the HTML box that now appears, copy and paste your widget's script there. In the example below, the script shown is for the Login Widget.
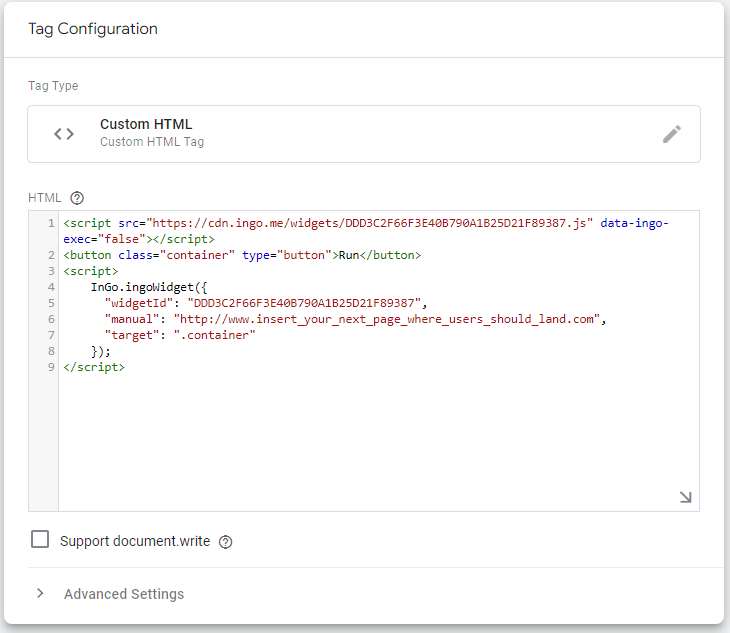
Remember to update any information needed for your widget's script. This article goes more in depth on how to configure your Generic Manual scripts.
Triggering a New Tag
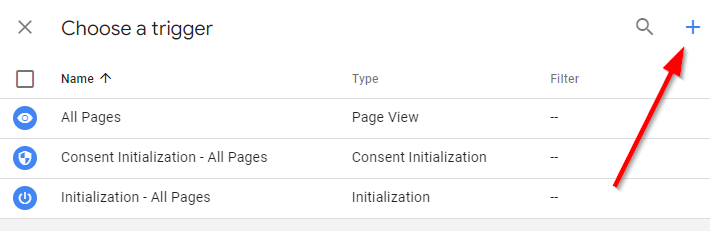
The last piece to configure on a new tag is the Triggering section, which controls how and when your widget will appear on your pages. Clicking into this section will open a new menu from the right-hand side of the page. Next, click on the plus (+) icon in the top-right to create a new trigger.
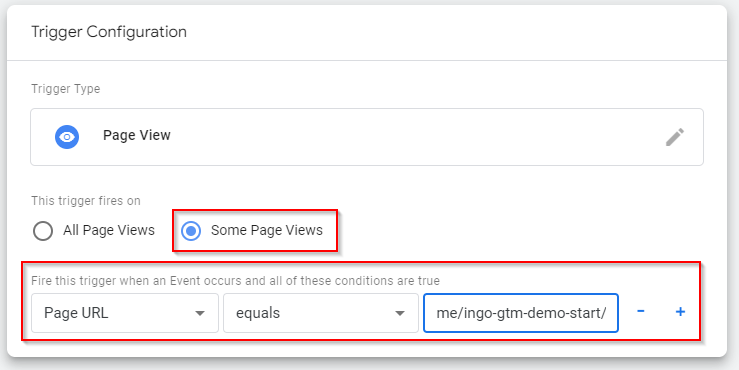
Another menu will appear where you can name your custom Trigger. Selecting the Trigger Configuration box on the page will open a final menu where the type of Trigger can be selected. In this case, Page View should be selected.

With the type selected, a few slight adjustments to the trigger will need to be made:
- Set the trigger to fire only on Some Page Views.
- Set the page views to require a Page URL, which equals a specific URL. This URL should be the page where you want the Login widget to appear. In most cases, this will be where you currently have a registration button listed on your site.
And that's it! Once you click Save, you will have now successfully set up a new Tag to work with an InGo widget! This process can be repeated for each of the other InGo widgets that will be installed, with their own respective script code and URLs.
Publish and Test Your Installation
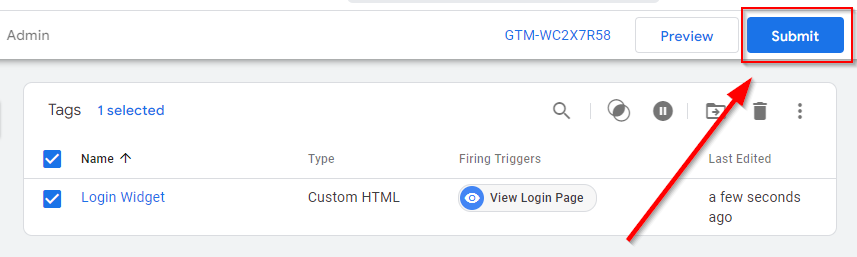
Returning to your main Workspace page, we now have a Tag created with an InGo widget ready and waiting. To make your changes live on your page, we'll need to publish them first. Click on the Submit button in the top-right of your page.
The menu that appears from the right-hand side of the page will display an overview of all changes that were made. For our purposes, this can be skipped through and we can click on the Publish button in the top-right.
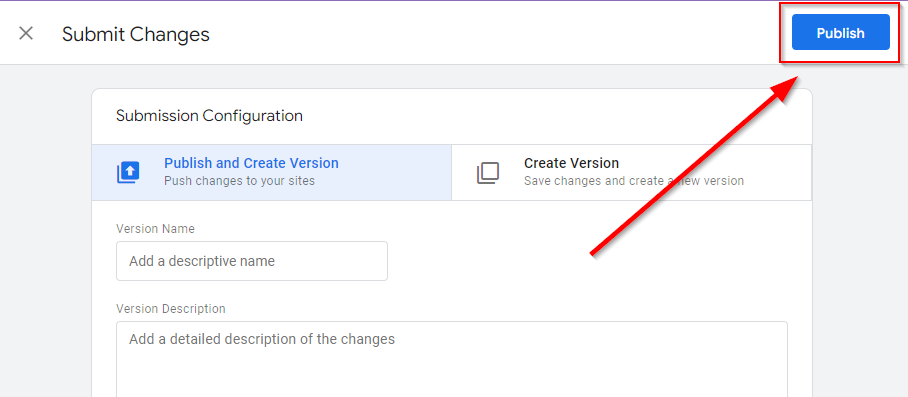
A final pop-up will appear, which we can just click on the Skip button to proceed. The changes will process and then a confirmation page will appear. Now all that's left is to visit your desired page and verify that your InGo widgets are now properly displaying.
For any questions or assistance with setting up a Google Tag Manager installation, please reach out to support@ingo.me.