Cvent Installation
The article describes the general process of installing InGo into an event on Cvent.
Requirements
- An active Cvent event
- Code Snippets functionality enabled on your Cvent account
- The Register button has been removed from your header template. This may require creating a new header template in Cvent without this option.
Setting Up Your InGo Widgets
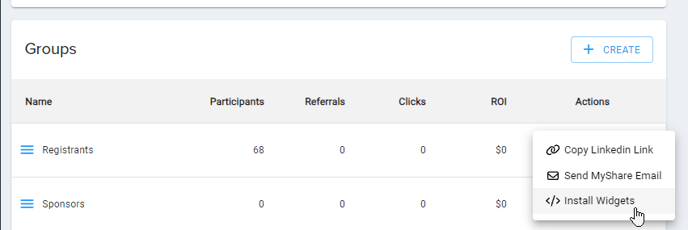
While on your InGo event's page, navigate to the Install Widgets page (Groups > Share > Install Widgets), and then select the Cvent option from the list of Registration Providers. These will be the set of widget scripts we will be using to Install InGo.

For assistance with locating these scripts for your install, please see this article.
Embedding Your InGo Widgets
The process for embedding InGo widgets onto Cvent will be the same for each type of widget being installed:
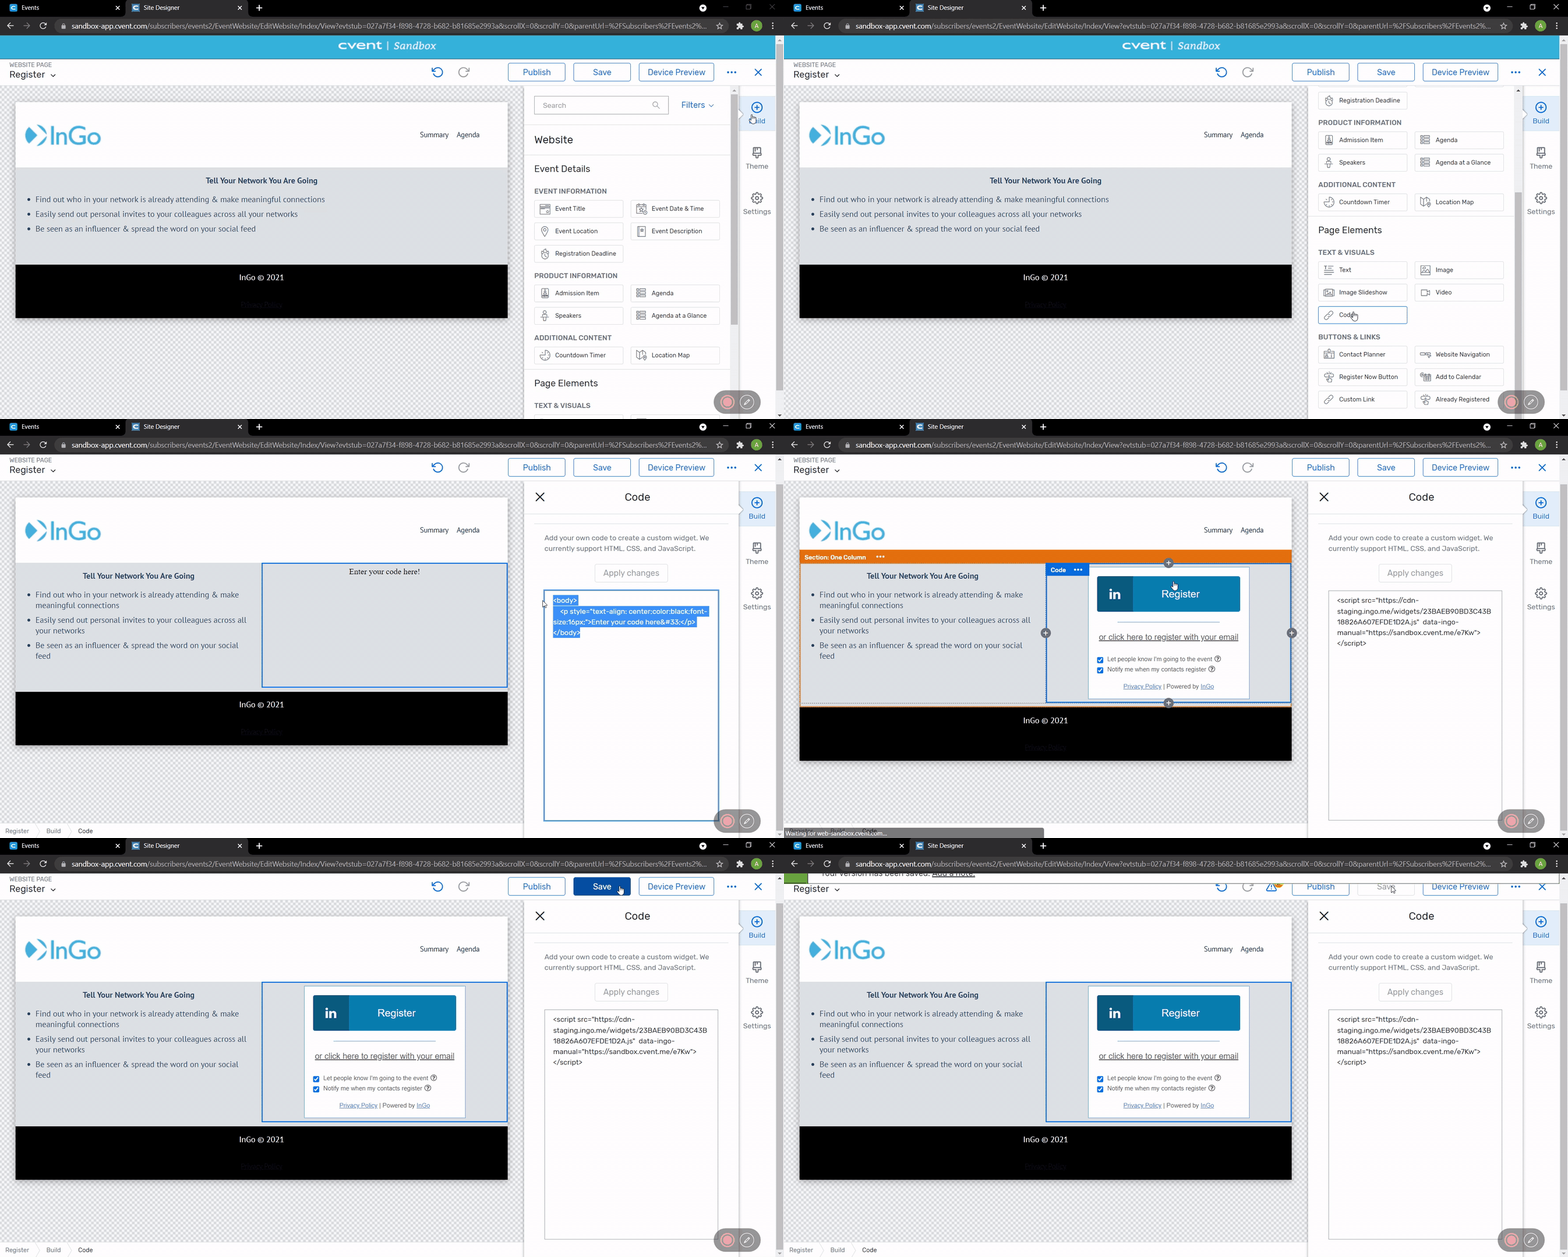
- Add a Code Snippet to the page where you want the InGo widget to appear
- Copy the widget script from InGo and paste it into the Code Snippet on Cvent
- Click on Apply Changes to verify the script appears on the page.
- Click the Save and then Publish buttons to finalize the changes and make them live.

Adding the Login Widget
This widget should be installed at the beginning of the registration process and before a user reaches a form to fill out.
Don't forget to replace the placeholder in the script with the URL of the next page in your registration process. Please see the example below for reference:
<script src="https://cdn.ingo.me/widgets/E5AA1955751D4132B24D2E6005AC3DCF.js" data-ingo-breakout="true" data-ingo-manual="##-REDIRECT-URL-##"></script>
Adding the Registration Widget
No registration widget is required for Cvent installations.
Adding the Confirmation and Social Widgets
These two widgets should be placed together on your confirmation page and each post-registration/pending approval page on Cvent.
Make sure to add both widgets together on the page to avoid issues with data-reporting or social-sharing functionality.
Test Your InGo Installation
Please see our guide on testing your InGo installation to ensure everything has been set up correctly. If you have any questions or run into issues, please don't hesitate to reach out to our support team at support@ingo.me.
