
Recipients receive a simple email featuring a preview of what their social post can look like. From there, they click the single call-to-action button, are brought to InGo's landing page, and can then share out their personalized post in a few short clicks.
VIP Notifications are one of the most effective ways to grow your events. This feature typically drives around a third of all results, and it works especially well for speakers, sponsors, and exhibitors, who have the largest and most relevant networks.
The following video steps through this functionality at a high level.
Requirements
Make sure your event has:
- Groups configured for each type of participant you want to include (see Group Setup).
- Participants in each group, synced from your registration platform or uploaded (see How to Upload Participants).
How it Works
You can begin setting up your VIP Notifications by first visiting your InGo event page and then clicking the Manage Emails button in the top-right.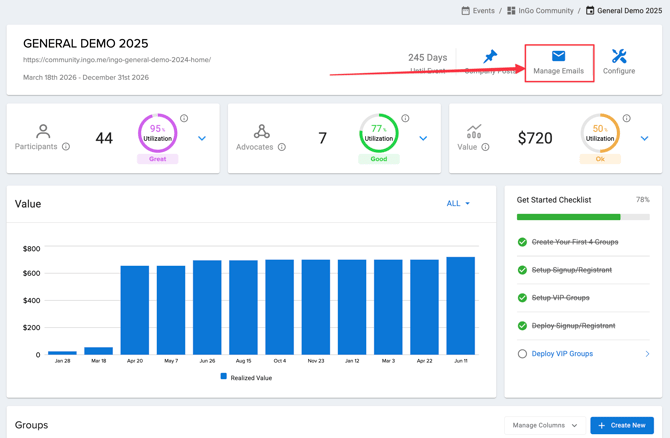
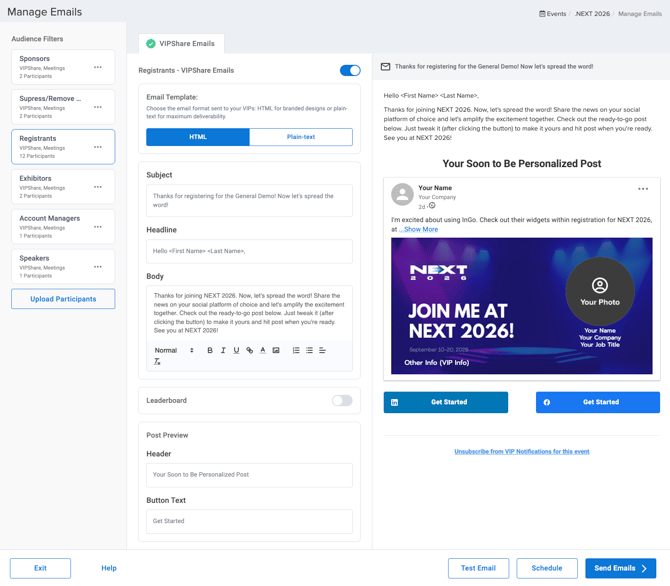
On the Manage Emails page, you can review your InGo Groups, upload more participants, edit the email content, view a live-rendered preview with real-time updates, and set up your scheduling campaign. Let's review each of these in turn below.
Audience Filters
This section allows you to view all of your InGo Groups that have been created for this event. Under each Group name you'll see the type of emails set up along with the number of users currently assigned to the Group. If more users need to be added, simply click on the Upload Participants button at the bottom of the section to add your .csv or .xlsx file containing that set of data. For step-by-step instructions, see How to Upload Participants.
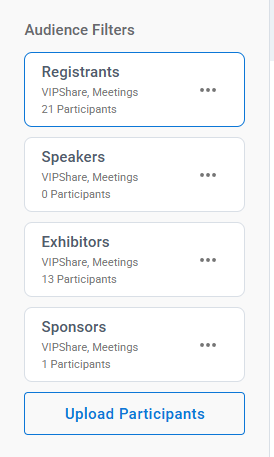
As with other areas in your InGo event that you can upload users, your spreadsheets can include users previously uploaded. Our system will only add net-new users and update existing ones if any data has changed.
IMPORTANT: Please note that individuals can only be added to a single InGo Group. If a participant is being uploaded into one Group, while already being assigned to another, our system will update their Group assignment during this process to the most recent assignment.
The exception is participants whose group was changed manually with Change Group. Their group is locked, and an upload won't move them. See How to Change a Participant's Group.
Clicking on a Group will also open up that specific Group's unique configuration, which will allow you to set up unique campaigns for each type of user, with language relevant to their role in your event.
InGo does include default language for each Group but we highly encourage clients to dive in and craft language that resonates with the audience attending the event.
PRO TIP: Speak to each group directly. A speaker is more likely to share "Let your audience know you're speaking at <Conference Name>" than a generic message.
Email Types and Editing Your Content
This section allows you to edit your email content based on what is enabled. At the top of the section, you'll see the VIPShare Emails tab. These emails encourage your participants to share their post using InGo.
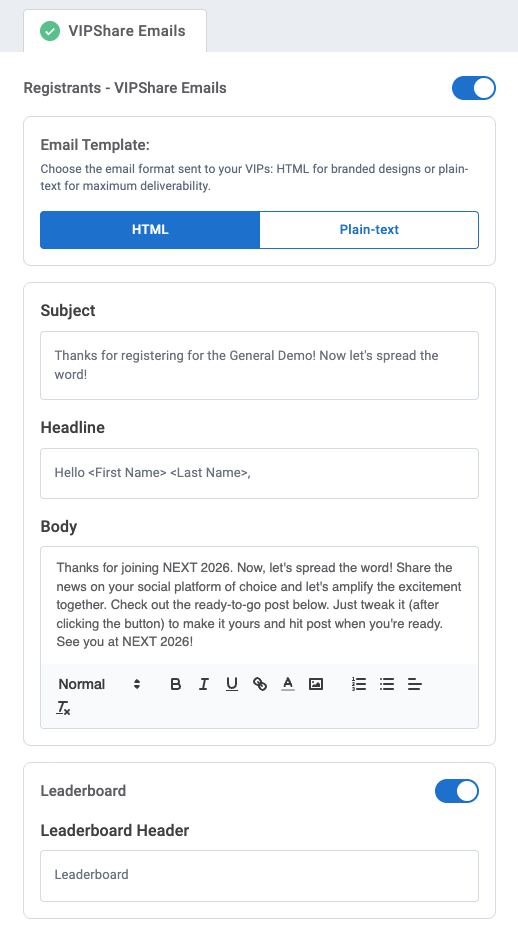
On the email itself, there are a few customization options you can adjust right from this screen. Outside of the main content itself such as Subject, Headline, and Body, you can also toggle on/off the email itself (for the Group) and the Leaderboard which is our gamification tool to spur more engagement.
Email Template
Choose the format for each group's email:
- HTML: a branded email with the full post preview and button
- Plain-text: a simple, text-only email that looks like a personal message and gives the best deliverability. A good choice if your audience's email systems are strict
Personalization: Placeholders like <First Name>, <Last Name> in the Subject, Headline, and Body are replaced with each participant's details.
Post Preview: Edit the Header above the post preview and the Button Text on the call-to-action button.
NOTE: Keep Button Text short, for example "Get Started" or "Share Now".
Preview Your Email
The third section on this page allows you to view a live preview of your email from a user's perspective. Any content you're updating on the email will immediately reflect in this real-time preview, so you can tinker with the verbiage until you've got it just right!
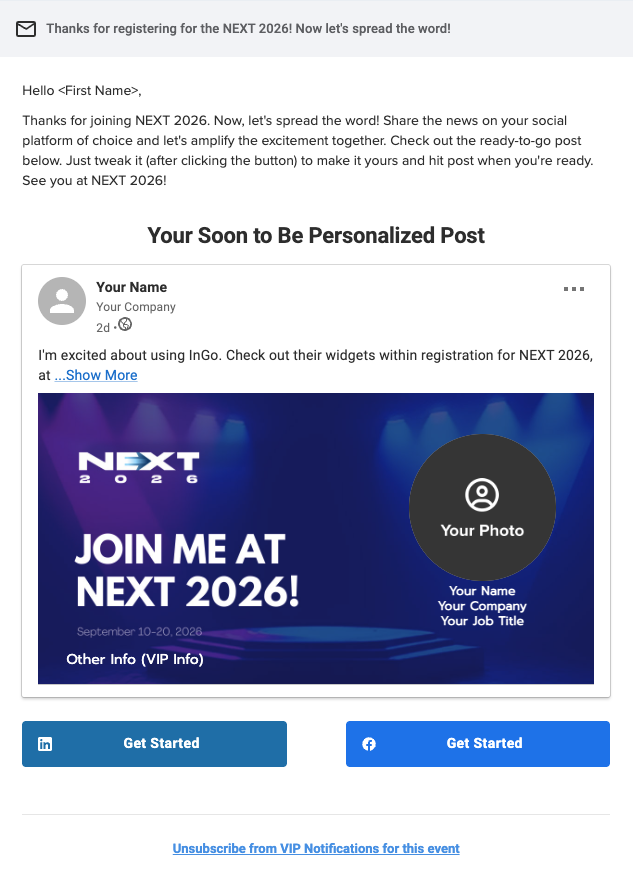
Scheduling and Sending Emails
The last section on this page is located in the bottom-right of the screen and contains three buttons: Test Email, Schedule, and Send Emails.
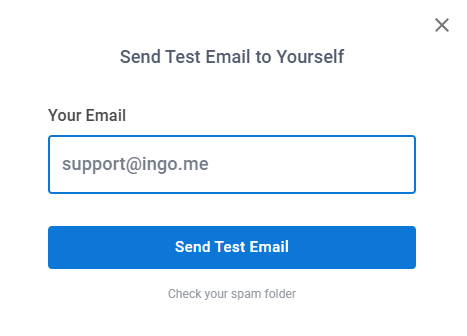
Clicking on the Test Email button will open a pop-up that lets you send a test to a specific email address.
Clicking on the Schedule button will open a menu where you can customize your sending campaigns, both for the event overall (All Groups) and at the individual Group level. You can also set the time in which these emails are sent, however this setting is global and cannot be customized per email send. The time uses the timezone shown next to it.
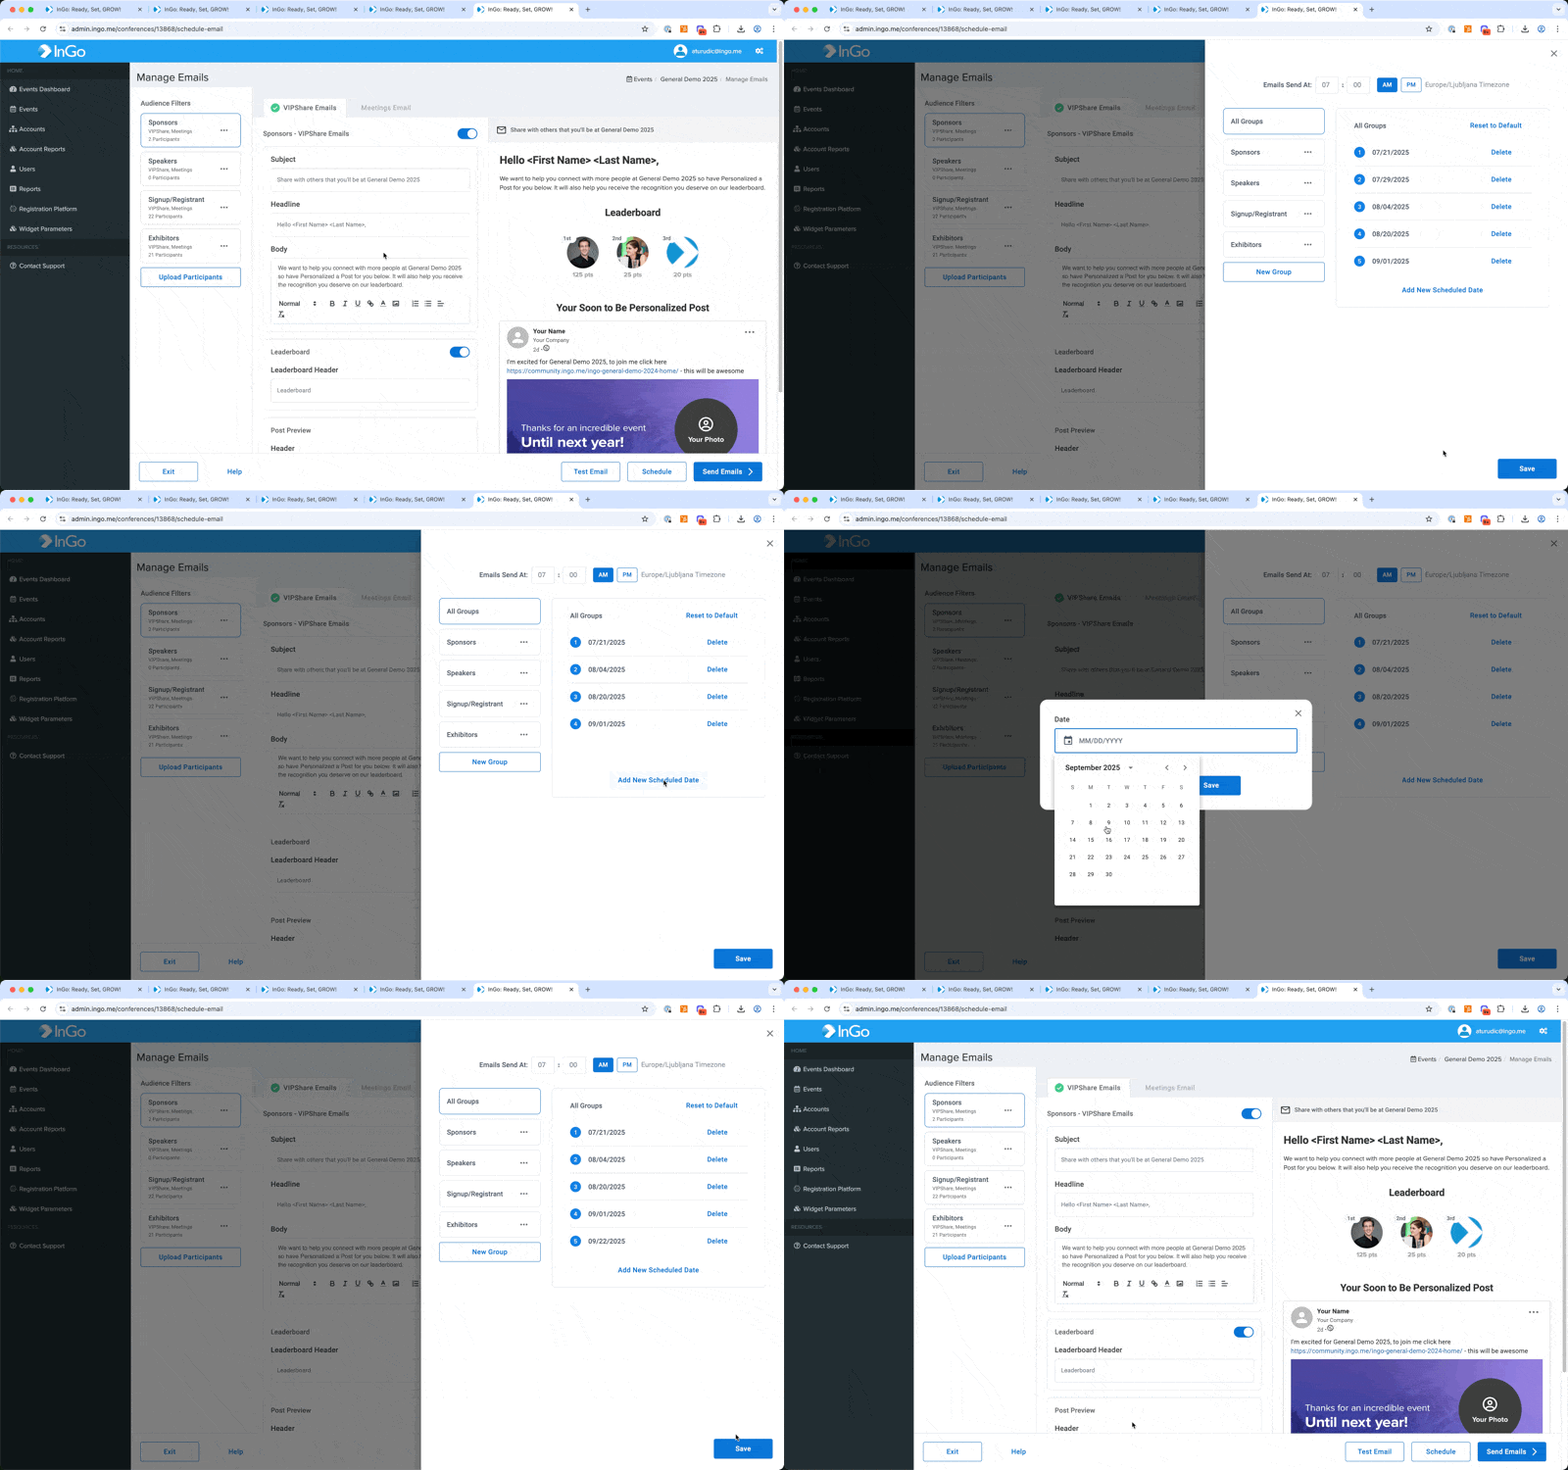
By default, every event starts with a schedule of 8 sends: 90, 75, 60, 45, 30, 15, 7, and 1 day before the event. If your event is set up with less than 90 days to go, only the remaining dates are scheduled. You can add dates with Add New Scheduled Date, remove them with Delete, or restore your account's defaults with Reset to Default. Click Save when you're done.
IMPORTANT: The default schedule is active as soon as your event is live. Review it before your first send date so there are no surprises.
NOTE: Your organization may require a minimum number of sends, set in Growth Reports. If you remove a required date, you won't be able to save the schedule. Move the date instead of deleting it, or ask your InGo admin to adjust the requirement.
PRO TIP: Dates under All Groups send to every group. Use per-group dates when some groups shouldn't receive every send, for example a suppression group. See How to Remove Participants.
You can also schedule and send VIP Notifications after your event has started.
Finally, the Send Emails button allows for you to immediately send out an email to a Group (or Groups) of your choice. Clicking this button will open a list of your groups in which you can click a Send Now button for the Group you would like.
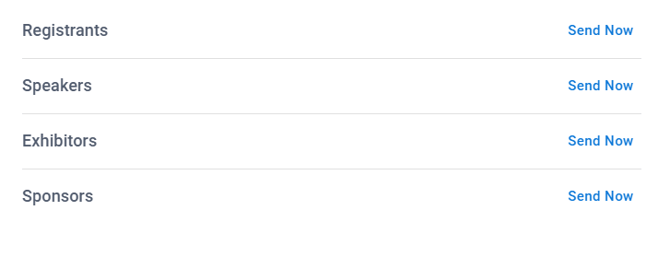
Send Now is greyed out for a group when its VIPShare Emails toggle is off, or when the group doesn't have a post graphic yet. Scheduled sends also skip these groups.
There is no secondary confirmation prompt when using the Send Now button. Please be sure you are ready to send your VIP Notifications this way before clicking the button as these cannot be recalled once sent.
Tracking Your Results
On the Event Summary page, in the Advocates drop-down you can check the Statistics of your VIP Notification Campaigns. Additionally, the Groups table shows VIP Notifications Sent and VIP Notifications Clicked for each group. Use this to confirm that sends went out and to see which groups respond best. If you need a list of exactly who received a specific send, contact InGo Support.
Receiving a VIP Notification
InGo VIP Notifications are only sent to participants who haven't shared yet. Once a participant shares a post, they stop receiving VIP Notifications for that event.
Any changes to the original post configuration settings will reset this requirement and allow users who may have posts previously to receive these again. These changes can include things like adding additional options, updating the graphics, or changing the posting text.
Every VIP Notification includes an unsubscribe link. Recipients can opt out of that event or of all events in your community. If your organization needs additional footer details, such as your legal name, mailing address, and privacy policy link, contact your Customer Success Manager.
Sending Emails From your Domain
All InGo VIP Notifications, by default, are sent from our domain: info@ingo.me. If you would instead prefer the sending address to be updated to your own, this can be configured across your entire InGo community for all of your events. A recognizable sender helps participants trust the email and can improve deliverability. This does require some customization so your organization's IT team and ours can work together to set this up.
To get started with this process, please contact your InGo Customer Success Manager to request this change and provide the email address you would like to use instead.
Launch Checklist
Run through this before your first send:
- Every group that should receive emails has a post graphic and post text
- The VIPShare Emails toggle is on for those groups, and off for groups that shouldn't receive them
- Your participant lists are clean: no test registrations, internal staff, or people who haven't actually registered
- If you sync via API, your group mapping puts each registration type in the right group
- Headshot and logo URLs are publicly accessible (not Google Drive or other links that need a login)
- You've sent a test email and checked it on desktop and mobile
- You've reviewed the schedule, including anything under All Groups
Best Practices
- Start early. The default schedule begins 90 days out. The earlier participants are added, the more chances they have to share
- Prioritize speakers, sponsors, and exhibitors. Give each their own group, graphic, and message
- Keep the default cadence. Sends closer to the event often perform best, so avoid cutting the final weeks
- Refresh your content. A new graphic or updated post text gives participants who already shared a new reason to share again
- Try Plain-text if your audience's email systems are strict
- Use your own sending domain so participants recognize the sender
Frequently Asked Questions
Emails went out that I didn't schedule. Why?
Every event starts with the default schedule. Open Manage Emails > Schedule to review or change the dates, including anything under All Groups.
Why is Send Now greyed out for one of my groups?
The group's VIPShare Emails toggle is off, or the group doesn't have a post graphic yet.
I didn't receive my test email.
Check your spam and promotions folders for mail from info@ingo.me (or your custom domain). If you've previously unsubscribed from InGo emails, tests to that address won't arrive. Wait a few minutes between repeated tests to the same address.
Why doesn't my photo or logo show in the test email?
Test emails use sample data. Real participants see their own details.
How do I stop emails to specific people?
Move them into a suppression group with no scheduled sends. See How to Remove Participants.
People who haven't registered are getting emails. Why?
If your event syncs via API, check your group mapping. For example, a registration type like "No Registration Type" may be mapped to an attendee group. Update the mapping and contact InGo Support to remove anyone already synced.
Why can't I save my schedule?
You may have removed a send date your organization requires. Move the date instead of deleting it, or ask your InGo admin to change the requirement in Growth Reports.
How do I know if my emails were sent?
Check VIP Notifications Sent in the Groups table on the Event Summary page. For a per-recipient list, contact InGo Support.
That’s it!
With VIP Notifications, your participants can easily help spread the word about your event — all with minimal effort on your part.
Please contact support@ingo.me with any questions.