When an event is first created, our system will automatically add dates to this list to send out community emails to registered users leading up to your event's go-live date. While these dates can be edited and/or removed entirely, if not action is taken then these emails will be sent as scheduled.
Please see the Setting Up Your Schedule section to learn how to make changes to your scheduled dates.
Getting Started
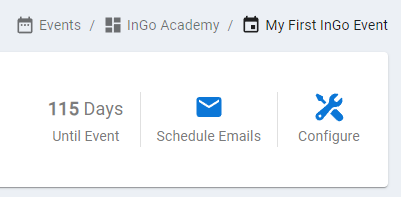
Options at a Glance
Overview
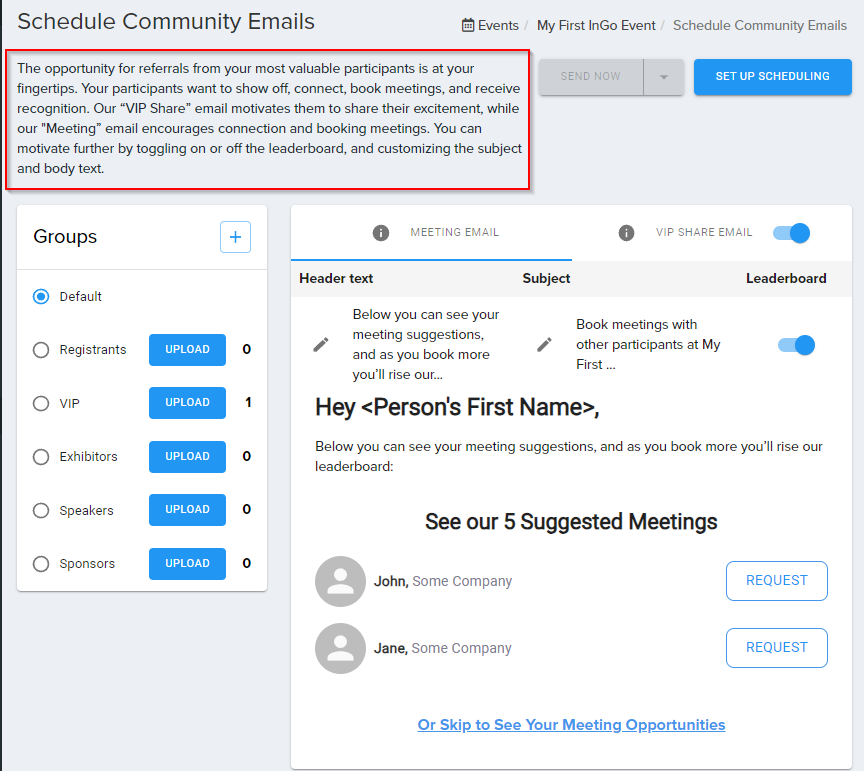
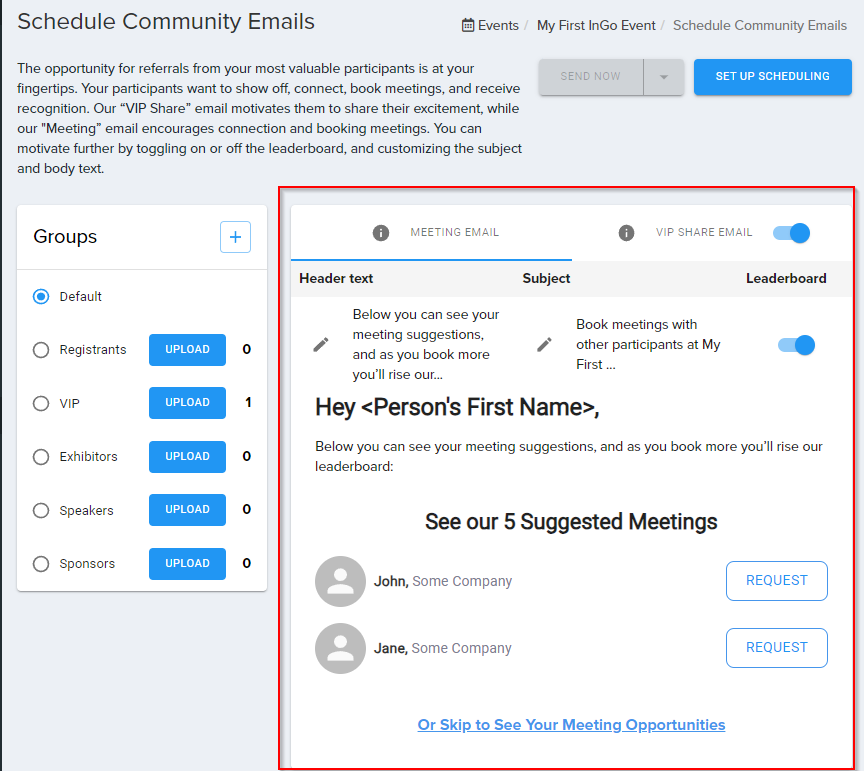
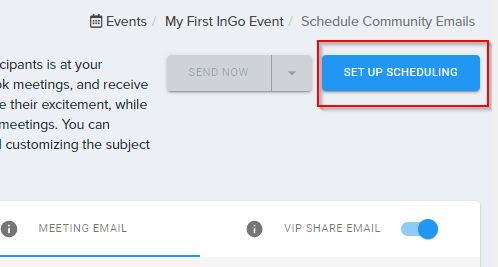
On the schedule emails page, there's a lot you can do to customize the experience for your registrants. At the top of the page will be a high level description of the two types of emails that can be sent: Meeting Emails and VIP Share Emails.
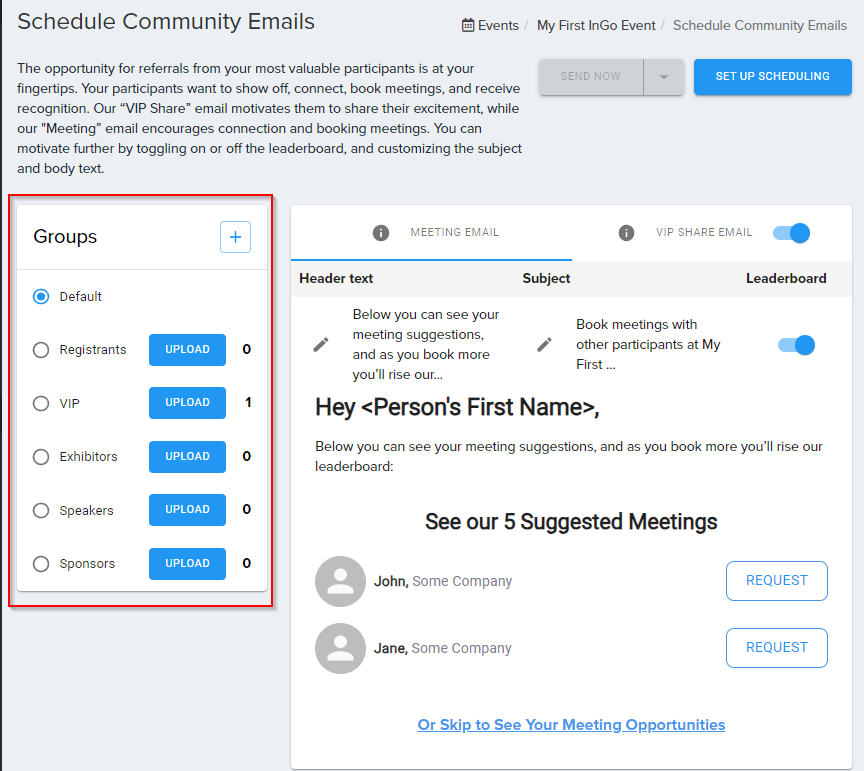
Managing Groups
To the left of the page will be the Groups menu, which will list out any and all Groups that have been created for your event. In the top-right of this menu will be a plus (+) icon button that can be clicked to create a new Group on-the-fly. While every Group will start off with the default text, each of these can be customized to each specific audience to create a truly catered experience.
Email recipients within a Group are pulled from your current list of advocates who have both signed up for your event and authenticated with a social login. If there are other recipients that need to be included, but were not captured in this way, clicking the Upload button next to a group will allow a .csv or .xls file to be uploaded with their information.
Don't know how to format your file? We've got you covered! A template file can be downloaded right from the Upload screen for your convenience.
Customizing Your Email Text
Both Meeting Emails and VIP Share Emails have standardized templates with a call-to-action for your community which is not able to be modified, however you are able to customize both the subject line of the email and the header text that goes above your InGo content.
For VIP Share Emails, these can be disabled by clicking on the slider icon next to the tab for that email type. If disabled, then only the Meeting Email will go out to your email recipients.
Setting Up Your Schedule
The Set Up Scheduling button in the top-right of the screen can be used to set your emails to go out at specific dates in the future. At this time, scheduling is limited to sending emails at midnight the morning-of your selected date and cannot be configured to be sent at specific times of day.
On the scheduling page, a list of already-scheduled dates when emails will go out can be viewed for your event. You can edit/delete items on the list by clicking the associated buttons next to each date.
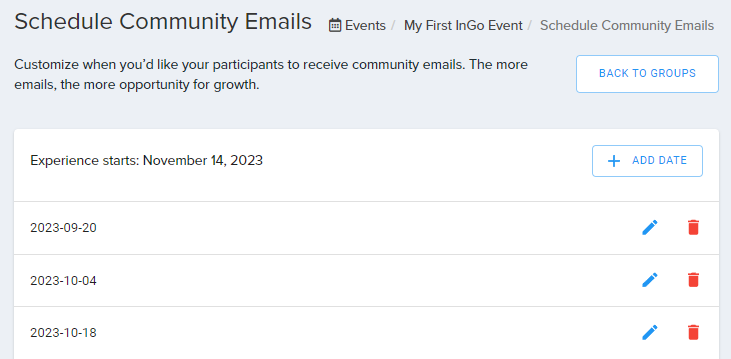
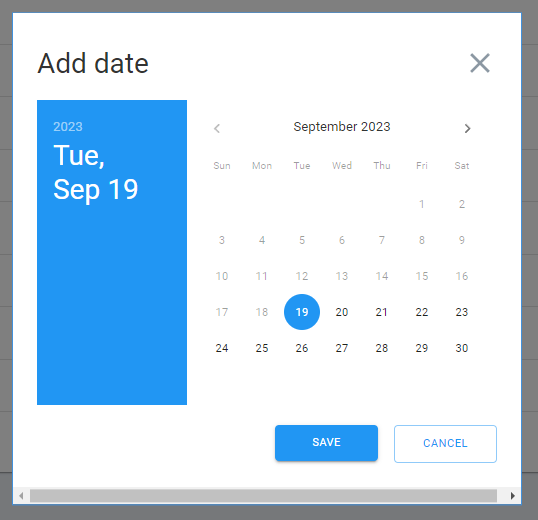
To add a new date, click on the Add Date button on the right-hand side of the page to open a pop-up calendar. As a reminder, emails can only be scheduled up to 60-days out from your experience's start date.
Sending Emails On-Demand
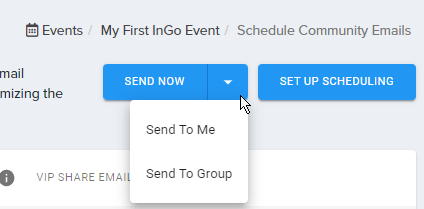
There may be times when you want to immediately send out a Community Email, be it to your community or to yourself as a test. To do so, click the Send Now button at the top of your page to open a small dropdown menu.
Clicking Send To Me will send your Community Email to the email address associated to your currently logged-in InGo account. This can be very useful for testing purposes if wanting to confirm how an email will appear prior to scheduling it for your community.
Clicking Send To Group will send this email to the Group you currently have selected from the left-hand side of your screen.
For any questions or assistance with setting up your Community Emails, please reach out to support@ingo.me.