
Participant Upload lets you add registrants, VIPs, speakers, sponsors and other attendees to your InGo event using a spreadsheet. Once uploaded, participants can receive VIP Notifications and appear in your event reports.
You can also use an upload to update details for existing participants in your event, or to move them to a different group. This article walks you through each step and explains the rules tied to uploads, including participants that sync in from your registration platform via API.
IMPORTANT: InGo identifies every participant by their email address. Uploading an email that already exists in your event can only update that participant instead of creating a duplicate. Make sure emails in your file are correct before you upload.
Plan Ahead
Make sure you have:
- Participant group created, in your event, that you want to upload into (for example, Registrants, Speakers, Sponsors, etc.). See Group Setup.
- A .csv or .xlsx file per group. A single upload can only target one group, so split participants for different groups into separate files.
- A name and email address for every row. These are required.
Template Upload columns
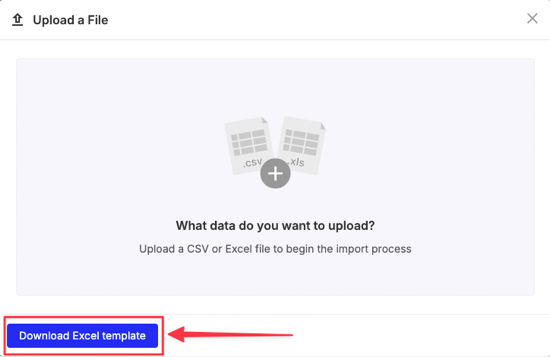
You can download the InGo Spreadsheet template from the Upload a File window by clicking Download Excel template.
Required Columns:
| Column | Notes |
| First Name | |
| Last Name | |
| Used to identify each participant |
Recommended Columns:
| Column |
| Company Name |
| Job Title |
Optional Columns:
| Column | Notes |
| Headshot | Publicly accessible image URL |
| Company Logo | Publicly accessible image URL. The same logo URL can be used for several participants |
| Description | VIP Information / Advanced VIPShare only |
| Location | VIP Information / Advanced VIPShare only |
| Date and Time | VIP Information / Advanced VIPShare only |
| URL | VIP Information / Advanced VIPShare only |
| Other VIP Information | VIP Information / Advanced VIPShare only |
PRO TIP 1: Column headers in your spreadsheet don't have to match the template names exactly. You'll map your columns to InGo's fields during the upload.
PRO TIP 2: Include Company Name and Job Title whenever you can. They help personalize posts.
Step 1: Open the Upload Window
There are two ways to get there. Both open the same Upload a File window.
Option A: From Manage Emails (useful when managing VIP Notifications)
- On the Event Summary page, click Manage Emails
- Click Upload Participants on the left
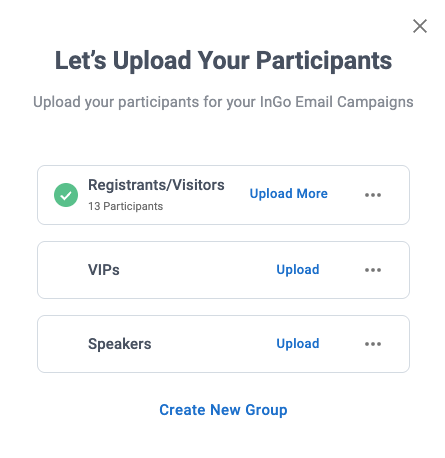
- Next to the group you want, click Upload. If the group already has participants, the link says Upload More.
Option B: From the Participants report
- On the Event Summary page, click Configure and select Registrants / Participants
- Click Upload Participants on the left
- Next to the group you want, click Upload. If the group already has participants, the link says Upload More.
Step 2: Add Your File
-
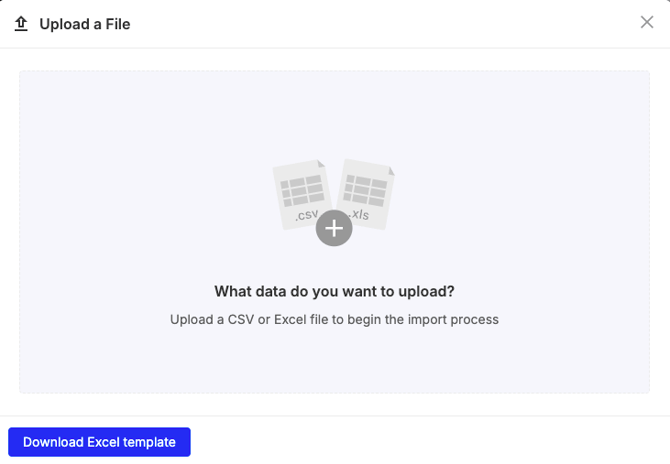
Add your .csv or .xlsx file to the Upload a File window. Adding the file doesn't import data right away
- Select header row and click Next
Step 3: Map Your Columns
InGo lists each column from your file with a sample value, next to a dropdown of InGo fields (First Name, Last Name, Email, Job Title, Company Name, etc.).
- Choose the matching InGo field for each column
- Leave any column you don't want to import as Unmapped or Delete. Unmapped columns are skipped
- Click Next
Step 4: Review and Fix Your Data
You'll see a preview of every row, split into three tabs: All rows, Clean rows and Rows with issues.
- Open the Rows with issues tab
- Fix anything flagged (for example, a missing name or email). You can:
- Edit cells directly in the preview
- Use Find and replace for repeated corrections
- Use Fix using AI to suggest corrections
- Export the flagged rows, fix them offline and upload them again later
PRO TIP: Nothing is saved to InGo until you click Import, so take your time reviewing here.
Step 5: Import and Confirm
- Click Import. Larger files may take a few minutes or more to process
- Allow the system some time to process, then reload the page
- If you uploaded from Manage Emails, go to Participants report to confirm all participants are added to the group. On the Event Summary page, click Configure and select Registrants / Participants
NOTE: InGo doesn't send a confirmation email when an upload finishes. Check the group in the Registrants / Participants report to confirm your upload.
Uploaded participants show Uploaded in the Channel column, so you can tell them apart from people who registered or synced from your registration platform.
Updating Participant Details
To correct or update details for attendees who are already in your event (for example, a new job title or company name), upload them again with the corrected information, following the steps above.
- If the email already exists in your event, InGo updates that participant. No duplicate is created
- If the email is new, InGo creates a new participant
- Your file only needs the participants you're updating, not the whole group
IMPORTANT: Only columns that contain data are updated. If a column is missing or left blank in your new file, the participant keeps their existing value. For example, if you re-upload someone without a Job Title column, their current Job Title stays in place.
NOTE: The email must already be correct. Uploading a different email creates a new participant instead of updating the old one. If a participant's email is wrong, contact InGo Support and we'll help you correct it.
Participants can also adjust their own name, company, title and headshot before sharing their post. See Edit Your Post.
Participants Added via API
If your event is connected to a supported registration platform (such as Cvent, Bizzabo, RainFocus, Swoogo, ASP, Sessionboard or Visit by GES), InGo syncs your registrants automatically via API once every 24 hours. These participants show [Platform Name] (Sync) under the Channel column in the Participants report.
- Your registration platform is the source of truth. Data from the platform (such as name, job title and company) is overwritten on the next sync. To change permanently, update it in your registration platform.
- Data the platform doesn't send is kept. Details you add by upload that the platform doesn't provide stay in place.
Important Notes
- Names are auto-capitalized. Upload validation formats names automatically, so names with unusual capitalization may change (for example, "JD Salinger" becomes "Jd Salinger"). This can't be turned off at the moment.
- Image URLs must be public. Headshot and Company Logo links publicly accessible, or the image won't display.
- Certain fields need VIP Info or Advanced VIPShare. Description, Location, Date and Time, URL and Other VIP Information are only used if your event has one of these enabled. See Advanced VIPShare.
- Deleting participants is done by InGo Support. To stop outreach right away and request deletion, follow How to Remove Participants.
Frequently Asked Questions
I re-uploaded a participant, but their old headshot (or title) is still showing. Why?
Your new file most likely didn't include a value in that column. Blank or missing columns don't overwrite existing data. If the participant synced from your registration platform, update the field there instead.
Will uploading someone who's already in my event create a duplicate?
No. InGo matches participants by email, so an existing email updates the current record.
Can I upload participants to several groups in one file?
Not at the moment. Upload a separate file for each group.
Will I receive a confirmation email after my upload?
No. Check the group in the Registrants / Participants report to confirm your participants were added.
I uploaded the wrong list. How do I undo it?
Move the participants into a suppression group and ask InGo Support to delete them. See How to Remove Participants.
Questions or need help? Contact support@ingo.me.