
Overview
The Landing Page Editor is a tool that allows you to customize the look of the VIP Share pages for your event.
Quick reference
| Setting | Requirement |
|---|---|
| Body background image format | .jpg or .png |
| Body background image size | Under 5 MB |
| Headline length | Up to 80 characters |
| Subheadline length | Up to 140 characters |
Step 1: Open the Landing Page Editor
From the Event Summary page, scroll to the Groups section.
Click Edit Landing Page (the pencil icon button above the groups table).
This opens the Landing Page Template Editor, with your editing options on the left and a live preview on the right.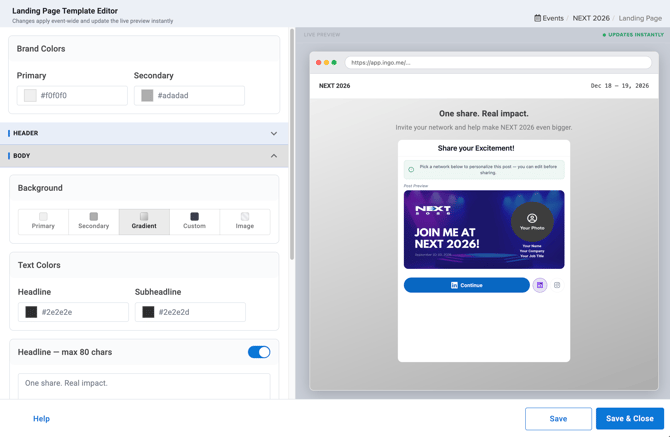
Step 2: Set your Brand Colors
At the top of the editor, set your Primary and Secondary colors.
Click a color swatch to open a color picker, or type a hex code directly into the field.
Tip: These two colors become your event's base palette. You'll be able to reuse them as background options in the Header and Body sections, so it's easiest to set them first.
Step 3: Customize the Header
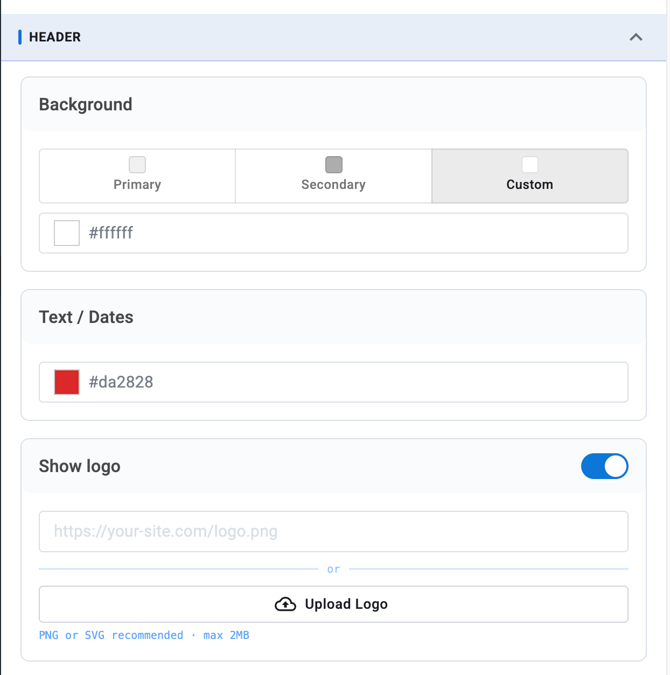
Click Header to expand this section. You can configure:
- Background - choose Primary, Secondary, or Custom (any hex color).
- Text / Dates - set the color used for the event dates.
- Show logo - toggle on to upload and display your event logo in the header.
Step 4: Customize the Body
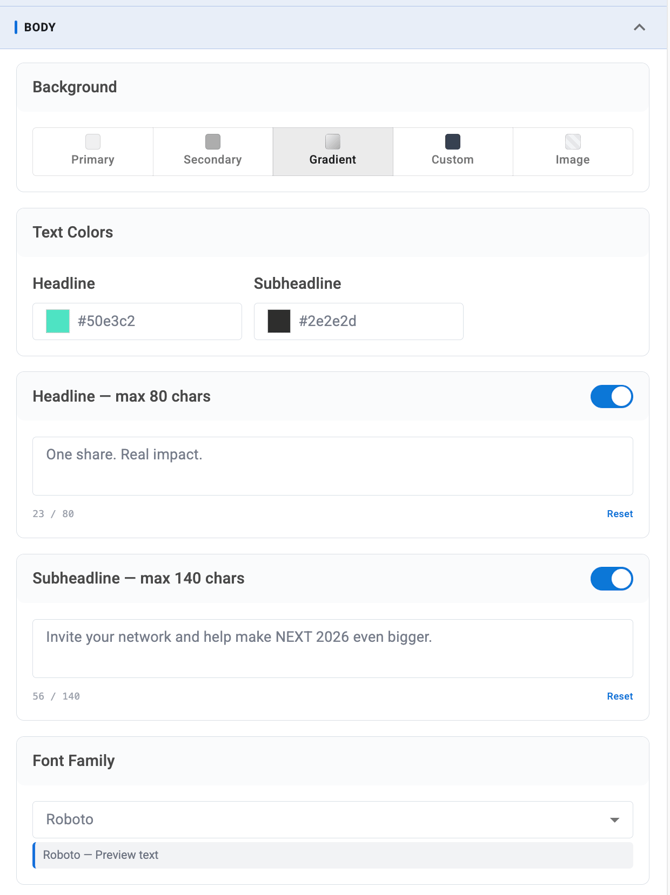
Click Body to expand this section. You can configure:
- Background - choose Primary, Secondary, Gradient, Custom, or Image.
- Text Colors - set separate colors for the Headline and Subheadline.
- Headline - toggle on or off, and edit the text (80 characters max).
- Subheadline - toggle on or off, and edit the text (140 characters max).
- Font Family - choose the font used across the page from the dropdown.
Note: If you choose Image as your Body background, you can paste an image URL or upload a file directly. Uploaded files must be .jpg or .png and under 5 MB.
Tip: Don't want a headline or subheadline shown? Toggle it off instead of deleting the text — that way it's ready to turn back on later.
Step 5: Check the Live Preview
As you make changes, watch the Live Preview panel on the right side, so you can confirm your preferred design before you save the change.
Step 6: Save your changes
When you're happy with the design, use one of the buttons at the bottom of the editor:
- Save - saves your changes and keeps the editor open so you can keep working.
- Save & Close - saves your changes and returns you to the Event Summary page.
Changes apply event-wide. Anyone visiting your event's landing page will see the updated version right away.
Troubleshooting
My headline or subheadline text isn't showing up.
Check that the toggle next to it is switched on. Text is only saved and displayed when its toggle is on.
My uploaded background image won't upload.
Confirm the file is a .jpg or .png and under 5 MB. Larger files or other formats aren't supported.
Text is hard to read against my background.
Choose Text Colors that contrast clearly with your chosen background color or image, and check the Live Preview before saving.
Frequently asked questions
Do I need design or coding experience to use the Landing Page Editor?
No. It's a visual, no-code, and beginner-friendly editor.
Will my changes apply to all participant groups (Speakers, Sponsors, Registrants/Visitors, etc.)?
Yes. The landing page is set at the event level, so changes apply across the whole event, not to a single participant group.
Can I make additional updates later even if my event is live?
Yes. You can reopen the Editor at any time to roll out desired adjustments.
How can I edit the "Share your Excitement!" text in Social Surface?